
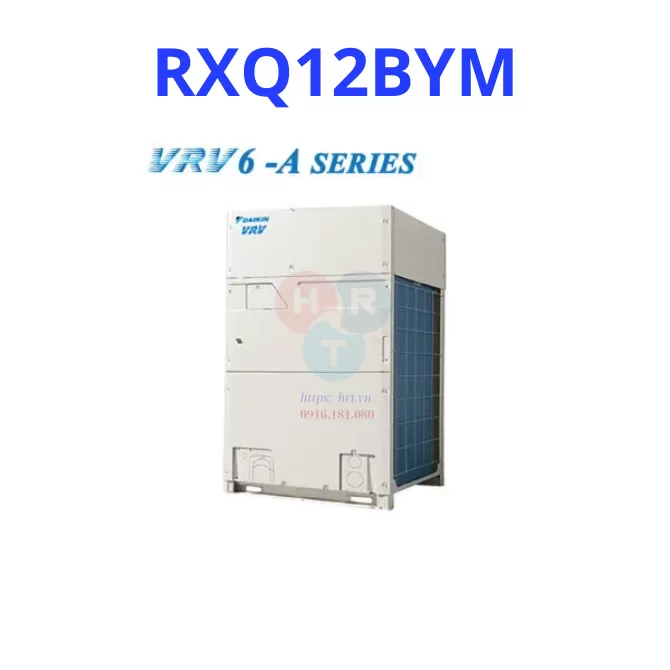
Key specifications RXQ12BYM
| Specification | Value |
|---|---|
| Model | RXQ12BYM |
| Cooling capacity | 114.000 Btu/h (~ 33.5 kW) |
| Power consumption | 8.38 kW |
| Dimensions (Height x Width x Depth) | 1.660 x 930 x 765 mm |
| Weight | 210 kg |
| Refrigerant type | R410a (environmentally friendly) |
| System | VRV A, cooling only |
VRV A cooling-only outdoor unit Model: RXQ12BYM is an ideal choice for premium commercial and residential projects. Featuring advanced technology from Daikin, this product delivers powerful cooling, stable operation, and outstanding energy savings.
Key specifications RXQ12BYM
| Specification | Value |
|---|---|
| Model | RXQ12BYM |
| Cooling capacity | 114.000 Btu/h (~ 33.5 kW) |
| Power consumption | 8.38 kW |
| Dimensions (Height x Width x Depth) | 1.660 x 930 x 765 mm |
| Weight | 210 kg |
| Refrigerant type | R410a (environmentally friendly) |
| System | VRV A, cooling only |
Key advantages of the RXQ12BYM outdoor unit
1. High capacity – Fast cooling
With a cooling capacity of up to 114.000 Btu/h (~33.5 kW), the RXQ12BYM can meet the cooling needs of multiple spaces at the same time, making it suitable for office buildings, hotels, and shopping centers.
2. Optimal energy savings
Consuming only 8.38 kW of power, this outdoor unit helps reduce operating costs while maintaining cooling performance. It is an ideal choice for those focused on long-term cost-effectiveness.
3. Uses R410a refrigerant
R410a is an environmentally friendly refrigerant that does not harm the ozone layer and offers high cooling efficiency, helping extend the equipment's service life.
4. Compact design – Easy installation
Measuring just 1.660 x 930 x 765 mm and weighing 210 kg, the RXQ12BYM can be easily installed on a roof or technical floor, optimizing available space.
5. Compatible with VRV central air conditioning systems
This product is part of Daikin's VRV A central air conditioning system, known for its ability to connect multiple indoor units, easy expansion, and smart control.
Practical applications of the RXQ12BYM
-
Office buildings
-
Shopping centers
-
Luxury villas and townhouses
-
Hotels and resorts
Conclusion: RXQ12BYM
VRV A cooling-only outdoor unit Model: RXQ12BYM is an efficient, durable, and energy-saving cooling solution. With its modern design, advanced technology, and stable operation, this product is a leading choice for any project.
🔧 INSTALLATION GUIDE FOR VRV A OUTDOOR UNIT MODEL: RXQ12BYM
🧰 1. Preparation before installation
✅ Required tools:
-
Pressure gauge
-
Vacuum pump
-
Copper pipe welding machine, brazing gas, striker
-
Torque wrench, screwdriver, electrical pliers
-
Electronic level (if available)
-
Protective equipment (gloves, safety glasses, insulated shoes)
✅ Check the installation location:
-
Well ventilated: Ensure the outdoor unit is placed in an area with good airflow and is not obstructed.
-
Strong load-bearing capacity: The floor or support frame must be strong enough to bear the weight of 210kg.
-
Easy maintenance: Allow at least 300mm of clearance around the outdoor unit and at least 1m in front of the fan outlet.
-
Vibration reduction: Use anti-vibration rubber pads or install on a dedicated support frame.
🔩 2. Mechanical installation
✅ Step 1: Position and secure the outdoor unit
-
Use expansion bolts or a support frame to secure the outdoor unit to a concrete base or steel stand.
-
Ensure the outdoor unit is perfectly level to prevent vibration and fan damage.
✅ Step 2: Connect the copper pipes
-
Use standard copper pipe (thickness ≥ 0.8mm).
-
Clean the pipe ends and braze them tightly using Nitrogen gas to prevent oxidation.
-
Ensure pipe length and elevation differences are within the manufacturer's specifications.
✅ Step 3: Connect the condensate drain pipe (if applicable)
-
Route the pipe outdoors with a natural downward slope, avoiding bends.
-
Ensure the pipe is not blocked, which could cause water overflow.
⚡ 3. Electrical connections
✅ Power supply:
-
Use a 3-phase 380V – 50Hz power supply and appropriately sized wiring (typically ≥ 6mm²).
-
Install a dedicated circuit breaker for the outdoor unit.
-
Connect terminals L1, L2, L3, N and earth (PE) correctly according to the manufacturer's wiring diagram.
✅ Controls:
-
Connect the control signal wires according to the VRV circuit diagram, using shielded cable.
-
Never connect the signal wires and power wires incorrectly to prevent circuit damage.
🔍 4. Checking, vacuuming, and refrigerant charging
✅ Vacuuming:
-
Use a dedicated vacuum pump to evacuate the system for at least 30 minutes or until a pressure of -760mmHg is reached.
-
Ensure that there is no air or moisture remaining in the pipes before charging refrigerant.
✅ Refrigerant charging:
-
The RXQ12BYM outdoor unit is pre-charged with a quantity of R410a refrigerant for the standard pipe length.
-
If the pipe length exceeds the allowable limit, add refrigerant at the rate required by the manufacturer (approximately 0.02 kg/m of additional pipe).
🟢 5. Startup and operation check
-
Turn on the power supply, then test-run the system using the central controller.
-
Check pressure, current, noise, and vibration during operation.
-
Confirm there are no refrigerant leaks, electrical leaks, or error alerts.
⚠️ Installation safety notes
-
Only trained technicians specializing in VRV systems are permitted to perform the installation.
-
Never do not start the system before vacuuming.
-
Install according to the applicable standards to avoid voiding the manufacturer's warranty.
Would you like me to also create an illustration showing the installation location and wiring diagram for model RXQ12BYM?
Technical specifications
Customer reviews
Share your feedback about the product
Ratings and reviewsRelated products
RXQ18BYM
RXQ16BYM
RXQ14BYM
RXQ10BYM
RXQ8BYM
Daikin VRV A Max 60HP RXQ60AMYMW Outdoor Unit - HRT
DAIKIN VRV A Max 58HP RXQ58AMYMW Outdoor Unit - HRT
DAIKIN VRV A Max 56HP RXQ56AMYMW Outdoor Unit - HRT
Sender information
- There are no products in the cart yet